介绍
JOS是MIT的操作系统实验课,和MIT的其他课程一样,质量很高。
这篇博客是为了记录JOS实验1的内容,另外是为了防止自己偷懒,不想在一件事上拖拉太久。
JOS实验1的主要任务是
- 第一部分熟悉x86汇编语言,Qemu x86模拟器,以及PC的加电启动过程(Parts1:PC Bootstrap)
- 第二部分阅读6.828的kernel的bootloader,以及lab目录下的boot目录(Parts2: Boot Loader)
- 第三部分深入6.828的初始化部分,kernel目录下的JOS(Parts3:The Kernel)
先简单介绍一下上面的任务
- 第一部分主要就是熟悉x86汇编语言,以及Qemu和GDB联调JOS。
- 第二部分就是要阅读bootloader下源码,结合obj下的反汇编的内容,以及GDB和Qemu联调JOS,探索操作系统在启动阶段做了些什么。
- 第三部分就是操作系统启动完后的初始化部分,主要是初始化屏幕显示和初始化栈。
相应的实验也分为3部分,限于篇幅,每篇讲解一部分。
PC的启动
练习1 熟悉汇编
Exercise 1. Familiarize yourself with the assembly language materials available on the 6.828 reference page. You don’t have to read them now, but you’ll almost certainly want to refer to some of this material when reading and writing x86 assembly
We do recommend reading the section “The Syntax” in Brennan’s Guide to Inline Assembly. It gives a good (and quite brief) description of the AT&T assembly syntax we’ll be using with the GNU assembler in JOS.
实验1没有什么好说的,就是去熟悉下汇编语言,如果学过x86汇编就会很容易,因为AT&T的汇编语法和x86的汇编几乎是一一对应的。
练习2 调试探索BIOS的功能
Exercise 2. Use GDB’s si (Step Instruction) command to trace into the ROM BIOS for a few more instructions, and try to guess what it might be doing. You might want to look at Phil Storrs I/O Ports Description, as well as other materials on the 6.828 reference materials page. No need to figure out all the details - just the general idea of what the BIOS is doing first.
实验2主要是学会使用Qemu和GDB联调,通过si命令,探索启动阶段BIOS做了什么事情。具体做法如下:
- 首先cd到课程目录下
- 在一个终端中运行“make qemu-gdb”,在另一个窗口中运行“make gdb”
- 然后就一直si(单步执行),直到BIOS结束
如图所示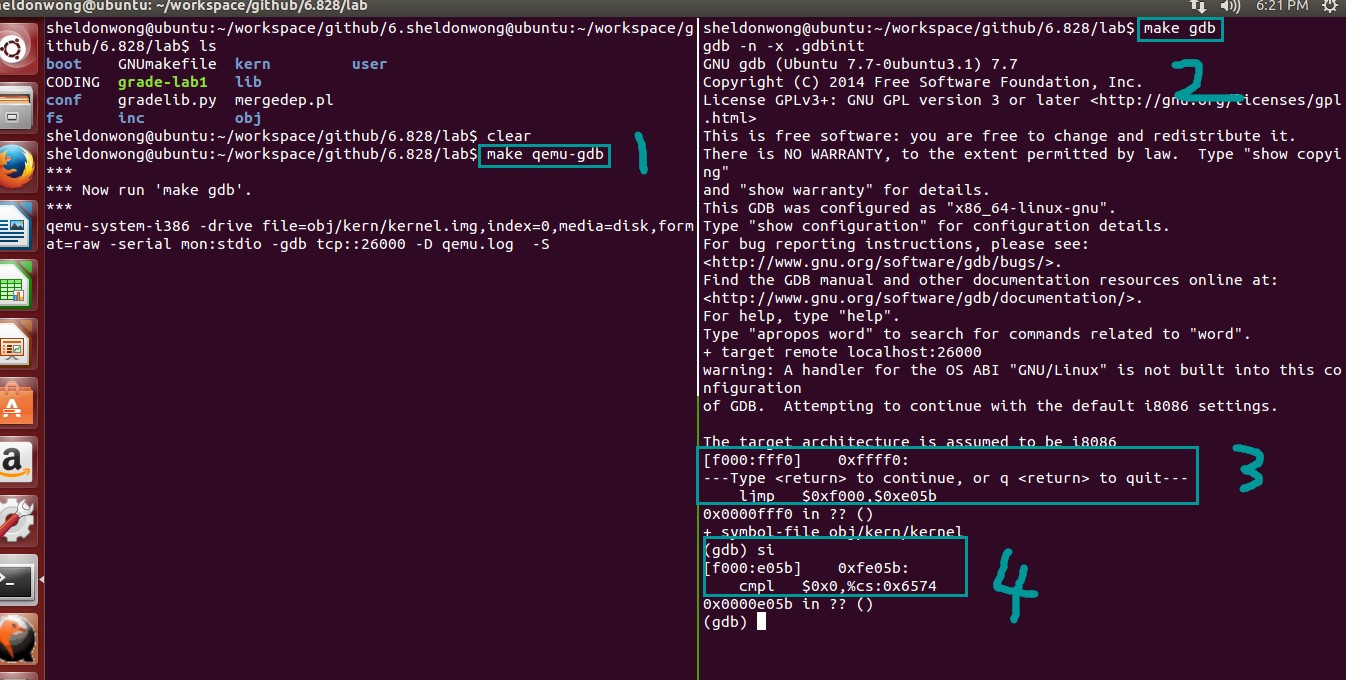
下面简单的对3和4做个说明
3处是PC加电启动后的第一条命令,只是一条跳转命令,跳转到加载BIOS的地方。
4处是执行si单步调试。
练习3 调试探索boot loader
Exercise 3. Take a look at the lab tools guide, especially the section on GDB commands. Even if you’re familiar with GDB, this includes some esoteric GDB commands that are useful for OS work.
Set a breakpoint at address 0x7c00, which is where the boot sector will be loaded. Continue execution until that breakpoint. Trace through the code in boot/boot.S, using the source code and the disassembly file obj/boot/boot.asm to keep track of where you are. Also use the x/i command in GDB to disassemble sequences of instructions in the boot loader, and compare the original boot loader source code with both the disassembly in obj/boot/boot.asm and GDB.
Trace into bootmain() in boot/main.c, and then into readsect(). Identify the exact assembly instructions that correspond to each of the statements in readsect(). Trace through the rest of readsect() and back out into bootmain(), and identify the begin and end of the for loop that reads the remaining sectors of the kernel from the disk. Find out what code will run when the loop is finished, set a breakpoint there, and continue to that breakpoint. Then step through the remainder of the boot loader.
实验3主要是为了熟悉更多的GDB调试命令,并使用GDB调试boot loader。
3.1 首先在0x7c00(boot扇区被加载到的地方)处设置断点,执行到断点。跟踪boot.S,使用源码和反汇编文件确定你的位置。使用x/i命令反汇编boot loader中的命令序列。比较boot loader的源码、反汇编文件boot.asm、GDB。
3.2 跟踪进入bootmain(),然后在进入readsect().识别出readsect()函数对应的反汇编指令。跟踪readsect()剩余部分并返回到bootmain().识别从硬盘的扇区中读取kernel的循环的开始和结束。找出循环结束时要执行的代码,在那里设置一个断点,执行到断点。然后单步boot loader剩余的部分。
其中第一部分较为简单,执行:1
2b *0x7c00
c
结果如图所示: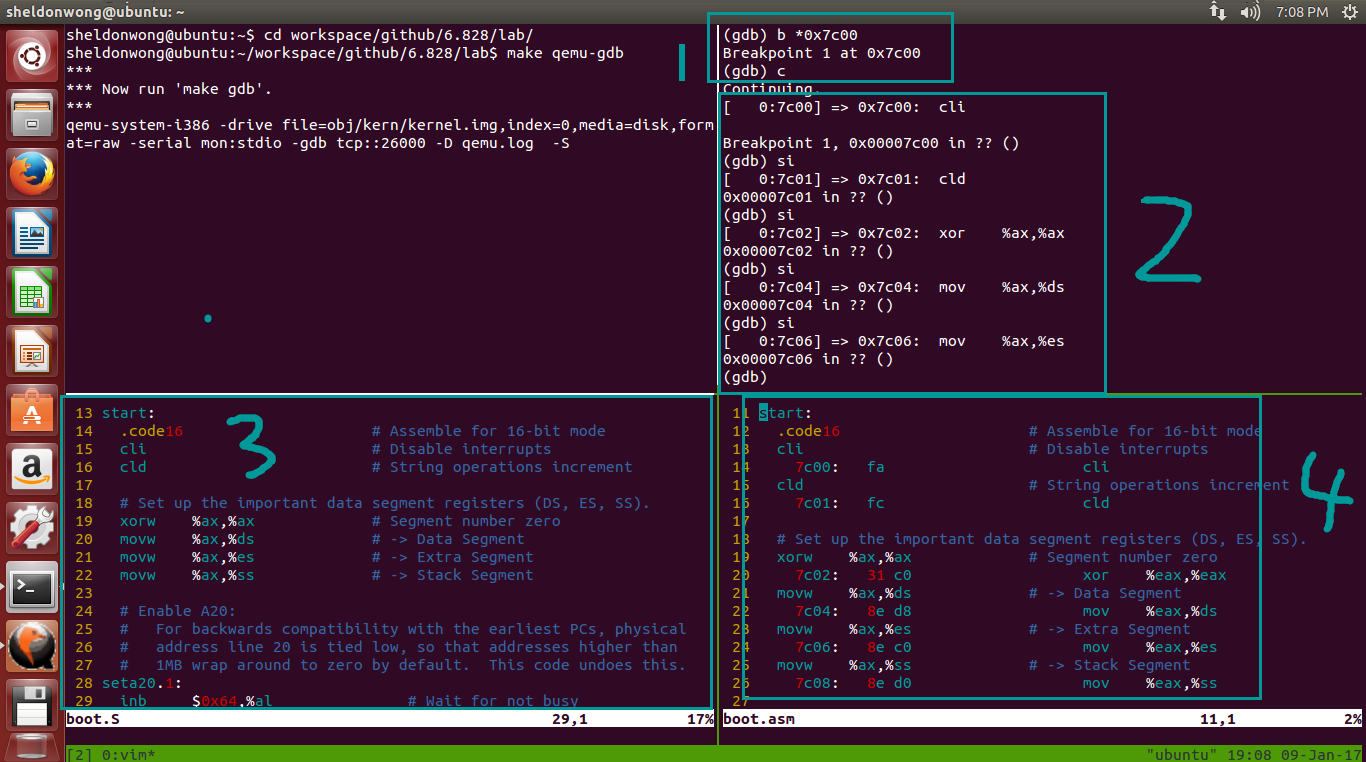
其中第二个窗口是GDB调试窗口
第三个窗口是源码文件 lab/boot/boot.S
第四个窗口是反汇编文件 lab/obj/boot/boot.asm
可以清楚的看到,三个窗口的内容相同。
第二部分要跟踪进入bootmain(),在进度readsect(),首先还是设置断点,借助于文件obj/boot/boot.asm中的地址,可以知道bootmain的地址位0x7d0a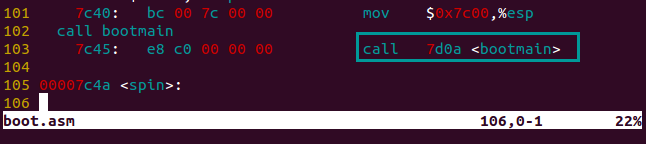
于是,在0x7d0a处设置断点,1
2b *0x7d0a
c
bootmain调用readseg(),readseg()循环调用readsect(),
main.c中的bootmain()函数,调用了readseg()
main.c中的readseg()函数,调用了readsect()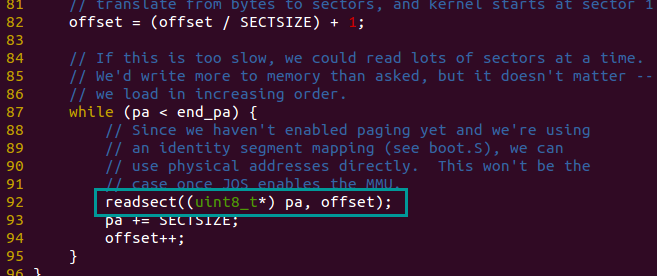
所以说,要先跟踪进入bootmain()函数中的readseg(),在跟踪近readsect(),借助boot.asm很方便的可以看到这些函数的地址。
通过si单步进入readseg()函数,地址0x7cd1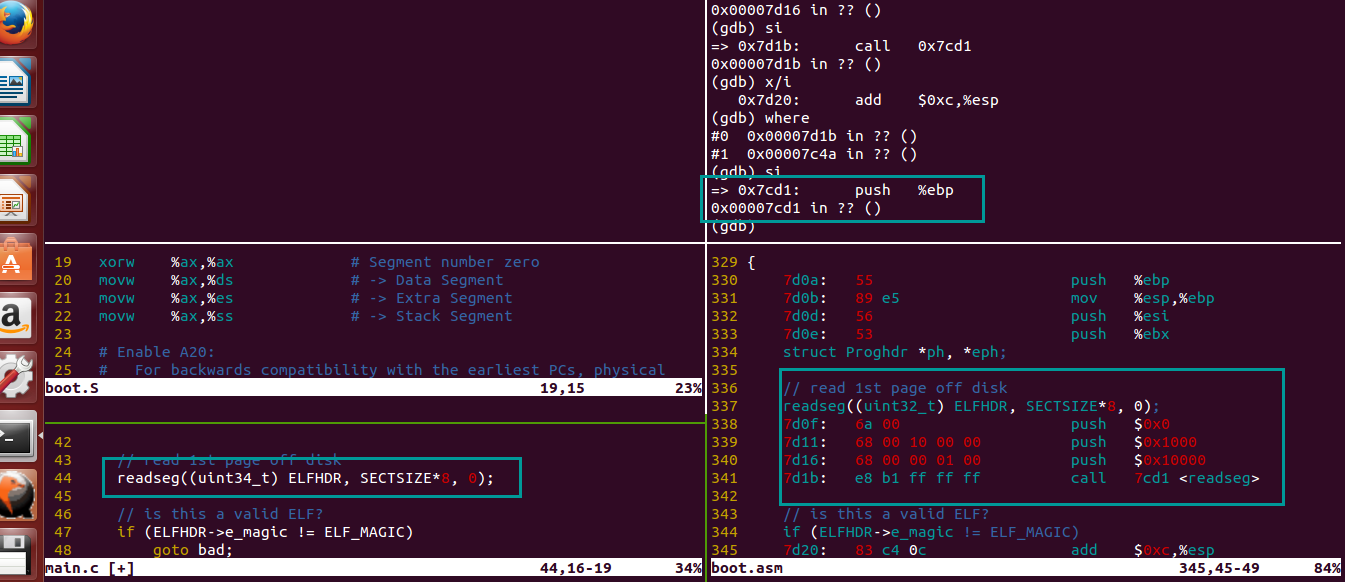
然后在si单步进入readsect(),当然也可以偷懒直接在boot.asm中找到循环开始的位置,设置断点,执行到断点,这里懒得做就没有做,直接读boot.asm了。。。
循环结束的地方,指令地址是0x7d61,这里做的事情主要是跳转执行内核入口文件entry.S
总结一下实验1的第一部分:
- 熟悉x86汇编。
- 使用qemu和gdb调试,探索BIOS做了什么事情。
- 设置中断描述符表
- BIOS主要功能是检查并初始化设备,例如VGA等
- 探测物理内存大小
- 使用qemu和gdb调试jos的boot loader部分,探索boot loader的功能(这个最好是先读源码,然后结合着源码和反汇编文件调试)。
以上。 - 熟练使用gdb,包括以下部分
单步执行:si
设置断点:b *0x7c00
继续运行至断点:c
反汇编内存中的指令:x/Ni
关于gdb的部分,可以参考下这里:gdb